Steve Thomas - IT Consultant

As a small- or medium-sized business (SMB) owner, you know that growth is essential for success. But achieving growth can be difficult, especially when you’re working with limited resources. That’s where Microsoft 365 comes in.

Do more with less

Microsoft 365 is a comprehensive suite of tools and services designed to help SMBs get more done. It delivers the full power of Office apps, including Word, Excel, and PowerPoint, with the convenience of cloud-based collaboration. It also gives you access to features like secure file sharing, document workflow automation, and real-time communication. Best of all, Microsoft 365 is designed to work with the tools and services you already use.

With Microsoft 365, you can save time and money by eliminating the need for additional software or hardware. It’s easy to set up and manage, and it’s available at affordable price points. You can even use a single subscription to cover all the devices in your business, from PCs to phones to tablets.

Stay connected, wherever you are

By leveraging Microsoft 365, you can keep your team connected and engaged, regardless of their location. With cloud-based services like Microsoft Teams, you can have virtual meetings, chat with colleagues, and collaborate on projects in real time. And when you need to access files, emails, or other data while away from the office, you can do so securely with the Microsoft 365 mobile app.

Gain valuable insights with AI

Tools like Power BI and Azure AI enable you to gain valuable insights into your business. With Power BI, you can quickly create interactive dashboards that provide up-to-date information about the performance of your company. This can help you make better decisions and identify trends that could be a source of new opportunities.

Meanwhile, Azure AI allows you to leverage the power of artificial intelligence (AI) to improve customer service, automate processes, and optimize your business operations.

Secure your data

Finally, Microsoft 365 offers a range of advanced security features that help protect your data and keep your business safe. These include multifactor authentication, data loss prevention, and encryption to keep sensitive information secure. And if you ever need assistance with any of these functions, Microsoft’s world-class support team is always on hand to help.

In today’s competitive world, it’s essential for SMBs to have the tools and resources they need to succeed. Microsoft 365 can help you do just that. With its easy setup, affordable pricing, and powerful features, it’s a great way to give your business an edge. Try it today and see the difference Microsoft 365 can make in your SMB’s growth.

Don’t know where to get started? Contact us today! We’re here to help you discover the full potential of Microsoft 365.

Small- and medium-sized businesses (SMBs) like yours are the backbone of the global economy. You play an essential role in creating jobs, fostering innovation, and driving economic growth. But to stay competitive, you need to have access to the latest technology, and that often feels like an insurmountable challenge for SMBs with limited resources. Fortunately, Microsoft 365 can help.

Do more with less

Microsoft 365 is a comprehensive suite of tools and services designed to help SMBs get more done. It delivers the full power of Office apps, including Word, Excel, and PowerPoint, with the convenience of cloud-based collaboration. It also gives you access to features like secure file sharing, document workflow automation, and real-time communication. Best of all, Microsoft 365 is designed to work with the tools and services you already use.

With Microsoft 365, you can save time and money by eliminating the need for additional software or hardware. It’s easy to set up and manage, and it’s available at affordable price points. You can even use a single subscription to cover all the devices in your business, from PCs to phones to tablets.

Stay connected, wherever you are

By leveraging Microsoft 365, you can keep your team connected and engaged, regardless of their location. With cloud-based services like Microsoft Teams, you can have virtual meetings, chat with colleagues, and collaborate on projects in real time. And when you need to access files, emails, or other data while away from the office, you can do so securely with the Microsoft 365 mobile app.

Gain valuable insights with AI

Tools like Power BI and Azure AI enable you to gain valuable insights into your business. With Power BI, you can quickly create interactive dashboards that provide up-to-date information about the performance of your company. This can help you make better decisions and identify trends that could be a source of new opportunities.

Meanwhile, Azure AI allows you to leverage the power of artificial intelligence (AI) to improve customer service, automate processes, and optimize your business operations.

Secure your data

Finally, Microsoft 365 offers a range of advanced security features that help protect your data and keep your business safe. These include multifactor authentication, data loss prevention, and encryption to keep sensitive information secure. And if you ever need assistance with any of these functions, Microsoft’s world-class support team is always on hand to help.

In today’s competitive world, it’s essential for SMBs to have the tools and resources they need to succeed. Microsoft 365 can help you do just that. With its easy setup, affordable pricing, and powerful features, it’s a great way to give your business an edge. Try it today and see the difference Microsoft 365 can make in your SMB’s growth.

Don’t know where to get started? Contact us today! We’re here to help you discover the full potential of Microsoft 365.

If you are having performance issues, problems shutting down, booting up, memory or apps on your computer, you may have to perform a clean install of Windows 11. A clean install of Windows 11 entails wiping out all existing system files and reinstalling the operating system from scratch. This helps to resolve any conflicts that have built up over time due to software updates or other changes. There are four methods you can use to perform a clean install of Windows 11.

1. USB drive

The simplest way to perform a clean install of Windows 11 is to create a bootable USB drive with Microsoft’s media creation tool. This requires an 8 GB or larger USB drive and a valid Windows 11 Product Key (or digital license).

Once the USB drive is created, insert it into your computer and reboot. If your PC does not automatically boot from the USB drive, you will need to access the BIOS menu by pressing the appropriate key during startup (e.g., DEL, F12, etc.) and change the boot settings.

When you boot through the USB, you’ll be guided through the Windows 11 installation process. If you are reinstalling Windows 11, you won’t need to enter a product key. You simply need to accept the license terms, select the hard drive you want to install Windows 11 on, and follow the onscreen instructions. Keep in mind that deleting a drive partition or reinstalling Windows 11 on a specific drive will erase all the data stored on that drive.

During the installation, you’ll have to select the language and region, name your PC, determine whether the device is for personal or professional use, set up your Microsoft account, and customize your privacy settings.

2. ISO file

You can install Windows 11 by downloading an ISO file from the Microsoft support site. When downloaded, right-click the ISO file, click Mount > Virtual drive. Then, double-click the setup.exe file to begin the Windows 11 installation. Go through the installation guide and link the device to your Microsoft account.

3. Reset PC from recovery settings

If you already have Windows 11 installed but are experiencing issues like frequent system freezes, slow boot times, and more, you may be able to fix the problem by resetting your PC from the recovery settings. This method doesn’t work if you’re planning to upgrade from an older version of Windows.

To reset your PC, go to Settings > System > Recovery. In the recovery options, click on the Reset this PC button, click the remove everything option, and then select local reinstall. You can also configure the reinstallation options and choose whether to wipe just data, delete files from all drives, or download Windows from the cloud. Finally, press confirm and reset to reinstall Windows 11.

4. Advanced startup options

If you’re unable to boot your PC normally, you can use the advanced startup options to perform a clean install of Windows 11. To access the advanced startup options, press and hold the power button on your PC to do a hard reboot. Do this at least three times until the screen says “Automatic Repair.”

When you see this message, go to Advanced Options > Troubleshoot > Reset this PC > Remove everything . Select either cloud download or local reinstall, and choose whether to remove only files or format the entire drive. You’ll then be guided through the setup process as if you were doing a clean install from a USB drive.

Note that this method only works if you already have Windows 11 installed on the device.

Reinstalling Windows 11 can be a daunting process, which is why you can always consult with us to help you with the process. We have experience in performing clean installations of Windows 11 and can help you avoid any potential problems. Call us today.

A clean installation of Windows 11 is a great way to get your computer running like new again. It involves completely erasing all the data on your hard drive and then reinstalling Windows from scratch, with no software or files left over from previous versions. This can help improve performance and fix any system errors that may have been caused by corrupted files in the past. Additionally, it also gives you an opportunity to start fresh with a brand new operating system and customize it to meet your specific needs. A clean install of Windows 11 can be accomplished in four ways.

1. USB drive

The simplest way to perform a clean install of Windows 11 is to create a bootable USB drive with Microsoft’s media creation tool. This requires an 8 GB or larger USB drive and a valid Windows 11 Product Key (or digital license).

Once the USB drive is created, insert it into your computer and reboot. If your PC does not automatically boot from the USB drive, you will need to access the BIOS menu by pressing the appropriate key during startup (e.g., DEL, F12, etc.) and change the boot settings.

When you boot through the USB, you’ll be guided through the Windows 11 installation process. If you are reinstalling Windows 11, you won’t need to enter a product key. You simply need to accept the license terms, select the hard drive you want to install Windows 11 on, and follow the onscreen instructions. Keep in mind that deleting a drive partition or reinstalling Windows 11 on a specific drive will erase all the data stored on that drive.

During the installation, you’ll have to select the language and region, name your PC, determine whether the device is for personal or professional use, set up your Microsoft account, and customize your privacy settings.

2. ISO file

You can install Windows 11 by downloading an ISO file from the Microsoft support site. When downloaded, right-click the ISO file, click Mount > Virtual drive. Then, double-click the setup.exe file to begin the Windows 11 installation. Go through the installation guide and link the device to your Microsoft account.

3. Reset PC from recovery settings

If you already have Windows 11 installed but are experiencing issues like frequent system freezes, slow boot times, and more, you may be able to fix the problem by resetting your PC from the recovery settings. This method doesn’t work if you’re planning to upgrade from an older version of Windows.

To reset your PC, go to Settings > System > Recovery. In the recovery options, click on the Reset this PC button, click the remove everything option, and then select local reinstall. You can also configure the reinstallation options and choose whether to wipe just data, delete files from all drives, or download Windows from the cloud. Finally, press confirm and reset to reinstall Windows 11.

4. Advanced startup options

If you’re unable to boot your PC normally, you can use the advanced startup options to perform a clean install of Windows 11. To access the advanced startup options, press and hold the power button on your PC to do a hard reboot. Do this at least three times until the screen says “Automatic Repair.”

When you see this message, go to Advanced Options > Troubleshoot > Reset this PC > Remove everything . Select either cloud download or local reinstall, and choose whether to remove only files or format the entire drive. You’ll then be guided through the setup process as if you were doing a clean install from a USB drive.

Note that this method only works if you already have Windows 11 installed on the device.

Reinstalling Windows 11 can be a daunting process, which is why you can always consult with us to help you with the process. We have experience in performing clean installations of Windows 11 and can help you avoid any potential problems. Call us today.

Performing a clean install of Windows 11 allows you to start fresh with a completely new operating system that is free of old settings, unnecessary files, and potential malware. It also gives you the opportunity to upgrade your machine if you’ve been using an older version of Windows. Doing so can give your device faster boot times, improved stability, and enhanced protection against malicious software. Here are the different methods you can take to perform a clean install of Windows 11.

1. USB drive

The simplest way to perform a clean install of Windows 11 is to create a bootable USB drive with Microsoft’s media creation tool. This requires an 8 GB or larger USB drive and a valid Windows 11 Product Key (or digital license).

Once the USB drive is created, insert it into your computer and reboot. If your PC does not automatically boot from the USB drive, you will need to access the BIOS menu by pressing the appropriate key during startup (e.g., DEL, F12, etc.) and change the boot settings.

When you boot through the USB, you’ll be guided through the Windows 11 installation process. If you are reinstalling Windows 11, you won’t need to enter a product key. You simply need to accept the license terms, select the hard drive you want to install Windows 11 on, and follow the onscreen instructions. Keep in mind that deleting a drive partition or reinstalling Windows 11 on a specific drive will erase all the data stored on that drive.

During the installation, you’ll have to select the language and region, name your PC, determine whether the device is for personal or professional use, set up your Microsoft account, and customize your privacy settings.

2. ISO file

You can install Windows 11 by downloading an ISO file from the Microsoft support site. When downloaded, right-click the ISO file, click Mount > Virtual drive. Then, double-click the setup.exe file to begin the Windows 11 installation. Go through the installation guide and link the device to your Microsoft account.

3. Reset PC from recovery settings

If you already have Windows 11 installed but are experiencing issues like frequent system freezes, slow boot times, and more, you may be able to fix the problem by resetting your PC from the recovery settings. This method doesn’t work if you’re planning to upgrade from an older version of Windows.

To reset your PC, go to Settings > System > Recovery. In the recovery options, click on the Reset this PC button, click the remove everything option, and then select local reinstall. You can also configure the reinstallation options and choose whether to wipe just data, delete files from all drives, or download Windows from the cloud. Finally, press confirm and reset to reinstall Windows 11.

4. Advanced startup options

If you’re unable to boot your PC normally, you can use the advanced startup options to perform a clean install of Windows 11. To access the advanced startup options, press and hold the power button on your PC to do a hard reboot. Do this at least three times until the screen says “Automatic Repair.”

When you see this message, go to Advanced Options > Troubleshoot > Reset this PC > Remove everything . Select either cloud download or local reinstall, and choose whether to remove only files or format the entire drive. You’ll then be guided through the setup process as if you were doing a clean install from a USB drive.

Note that this method only works if you already have Windows 11 installed on the device.

Reinstalling Windows 11 can be a daunting process, which is why you can always consult with us to help you with the process. We have experience in performing clean installations of Windows 11 and can help you avoid any potential problems. Call us today.

When Microsoft announced this week that it was laying off 10,000 employees, it wasn’t exactly a shock. Other big companies, including Salesforce, Amazon and Meta, have already been down that road, and the news leaked far and wide before the official announcement on Wednesday. Alphabet joined in today, announcing another 12,000 job cuts.

Like these other companies, Microsoft is facing a shifting economic landscape and making adjustments to a workforce that was pumped up after the early days of the pandemic. Each of these companies added tens of thousands of employees to the payroll, and with the current economic uncertainty, they decided to dial it back (or at least use it as an excuse to cut costs).

Consider that Microsoft had over 220,000 employees at the end of last year, according to Statista. That’s up from 163,000 in 2020 and 181,000 in 2021, meaning the company added more than 57,000 employees in a two-year period before cutting 10,000 this week.

Data visualization by Miranda Halpern, created with Flourish

It’s not clear where the cuts are coming from, and there has been no official word from Microsoft. Bloomberg reported that engineering groups would be cut while also reporting that the HoloLens group took a hit after losing a big defense contract. Geekwire reported that there were big cuts to the Nokia group. Microsoft wouldn’t comment when asked by TechCrunch where the cuts were taking place.

This layoff represents a drop in the bucket for Microsoft financially, but it has a very real impact on the 10,000 people who were told they would be let go this week.

Microsoft hasn’t exactly been doing poorly, earning over $200 billion last year while committing $69 billion to pay for gaming company Activision Blizzard almost exactly a year ago. Today, it has a market cap of over $1.7 trillion — that’s with a T. In a filing with the U.S. Securities and Exchange Commission reporting the layoffs, the company indicated that it will write off $1.2 billion in costs related to the layoffs in the second quarter.

All of this is to say that this layoff represents a drop in the bucket for Microsoft financially, but it has a very real impact on the 10,000 people who were told they would be let go this week. If it was to impress investors, so far it’s not working — its stock ticked down in the days following the announcement before rebounding Friday.

With all of those financial resources, the question is why. What does Microsoft gain by cutting its workforce 5%? We spoke to a few analysts to try to figure it out.

A pretty good year

First, let’s take a quick look at Microsoft’s financials. Companies usually cut costs because the business no longer supports the workforce, but Microsoft has had a pretty decent year, as the chart below shows:

Microsoft joined the layoff parade. Did it really have to? by Ron Miller originally published on TechCrunch

Millions of people worldwide rely on Microsoft Word for their day-to-day tasks. However, most users are unaware of its full range of features that can help them work smarter and faster. Here are some handy tips that will help you maximize your productivity with Microsoft Word.

Use Grammarly for Windows

Microsoft Word might be great for identifying spelling and grammar mistakes, but it can’t guarantee error-free writing. To take your content to the next level, try Grammarly for Windows. Not only does it check for basic errors, but it also reviews the clarity and engagement of your content.

Hide the toolbar

To ensure a distraction-free writing session, you can easily minimize the toolbar located at the top of your screen by pressing Ctrl + F1. To make the toolbar reappear, just press Ctrl + F1 again.

Tell Word what to do

While many of Microsoft Word’s features are easily visible, others require a bit more digging before you can find them. Thankfully, newer versions of Word come with the Tell Me. This feature lets you enter search words or phrases in a text box that says “Tell me what you want to do” to perform an action, find features, or get help on how to complete your task.

Track only the changes you make

If you work with other people on a single document, you should be familiar with the Track Changes feature. It allows you to see every change made by others working on the document. Microsoft recently updated this feature, which allows users to only track their own changes.

This is a fantastic option for those occasions when tracking everyone else’s modifications isn’t necessary, and all you want is to see your own progress. Here’s how to use this feature:

  1. Click on the Review tab on your Word document.
  2. Click on the Track Changes button and choose the Just Mine option.

Save and reuse images, texts, signatures, and more with Quick Parts

If you find yourself typing or inserting the same thing multiple times in your Word document, then you should try using Quick Parts. This feature allows you to save and reuse images, texts, signatures, tables, and more. It streamlines your document and email workflows by speeding up repetitive tasks.

Here are the steps for using Quick Parts:

Creating a Quick Part

  1. Choose the words, images, or other elements you want to save on your Word document.
  2. Click Insert > Quick Parts and choose Save Selection to Quick Part Gallery.
  3. Change the name of your chosen element, and click OK to save your changes.

Adding a Quick Part to your document

  1. Place your cursor in a spot where you want to add a Quick Part.
  2. Click Insert > Quick Parts and click on the word, phrase, sentence, or image you want to add to your document.

If you’re looking for other ways to leverage Microsoft Word and other Office apps to boost your productivity, give us a call today.

Microsoft Word continues to be a popular office suite for many businesses because of its versatile features. It’s user-friendly and straightforward, but once you take some time to understand it more, you’ll learn that there is so much more than meets the eye. Here are some tips and tricks that will enhance your Microsoft Word experience.

Use Grammarly for Windows

Microsoft Word might be great for identifying spelling and grammar mistakes, but it can’t guarantee error-free writing. To take your content to the next level, try Grammarly for Windows. Not only does it check for basic errors, but it also reviews the clarity and engagement of your content.

Hide the toolbar

To ensure a distraction-free writing session, you can easily minimize the toolbar located at the top of your screen by pressing Ctrl + F1. To make the toolbar reappear, just press Ctrl + F1 again.

Tell Word what to do

While many of Microsoft Word’s features are easily visible, others require a bit more digging before you can find them. Thankfully, newer versions of Word come with the Tell Me. This feature lets you enter search words or phrases in a text box that says “Tell me what you want to do” to perform an action, find features, or get help on how to complete your task.

Track only the changes you make

If you work with other people on a single document, you should be familiar with the Track Changes feature. It allows you to see every change made by others working on the document. Microsoft recently updated this feature, which allows users to only track their own changes.

This is a fantastic option for those occasions when tracking everyone else’s modifications isn’t necessary, and all you want is to see your own progress. Here’s how to use this feature:

  1. Click on the Review tab on your Word document.
  2. Click on the Track Changes button and choose the Just Mine option.

Save and reuse images, texts, signatures, and more with Quick Parts

If you find yourself typing or inserting the same thing multiple times in your Word document, then you should try using Quick Parts. This feature allows you to save and reuse images, texts, signatures, tables, and more. It streamlines your document and email workflows by speeding up repetitive tasks.

Here are the steps for using Quick Parts:

Creating a Quick Part

  1. Choose the words, images, or other elements you want to save on your Word document.
  2. Click Insert > Quick Parts and choose Save Selection to Quick Part Gallery.
  3. Change the name of your chosen element, and click OK to save your changes.

Adding a Quick Part to your document

  1. Place your cursor in a spot where you want to add a Quick Part.
  2. Click Insert > Quick Parts and click on the word, phrase, sentence, or image you want to add to your document.

If you’re looking for other ways to leverage Microsoft Word and other Office apps to boost your productivity, give us a call today.

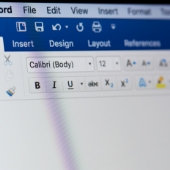
Microsoft Word is one of the most widely used office suites by businesses around the world. However, many users don’t know about its various features that can help them become more productive. This article will provide a comprehensive guide on how to maximize the potential of Microsoft Word to improve productivity.

Use Grammarly for Windows

Microsoft Word might be great for identifying spelling and grammar mistakes, but it can’t guarantee error-free writing. To take your content to the next level, try Grammarly for Windows. Not only does it check for basic errors, but it also reviews the clarity and engagement of your content.

Hide the toolbar

To ensure a distraction-free writing session, you can easily minimize the toolbar located at the top of your screen by pressing Ctrl + F1. To make the toolbar reappear, just press Ctrl + F1 again.

Tell Word what to do

While many of Microsoft Word’s features are easily visible, others require a bit more digging before you can find them. Thankfully, newer versions of Word come with the Tell Me. This feature lets you enter search words or phrases in a text box that says “Tell me what you want to do” to perform an action, find features, or get help on how to complete your task.

Track only the changes you make

If you work with other people on a single document, you should be familiar with the Track Changes feature. It allows you to see every change made by others working on the document. Microsoft recently updated this feature, which allows users to only track their own changes.

This is a fantastic option for those occasions when tracking everyone else’s modifications isn’t necessary, and all you want is to see your own progress. Here’s how to use this feature:

  1. Click on the Review tab on your Word document.
  2. Click on the Track Changes button and choose the Just Mine option.

Save and reuse images, texts, signatures, and more with Quick Parts

If you find yourself typing or inserting the same thing multiple times in your Word document, then you should try using Quick Parts. This feature allows you to save and reuse images, texts, signatures, tables, and more. It streamlines your document and email workflows by speeding up repetitive tasks.

Here are the steps for using Quick Parts:

Creating a Quick Part

  1. Choose the words, images, or other elements you want to save on your Word document.
  2. Click Insert > Quick Parts and choose Save Selection to Quick Part Gallery.
  3. Change the name of your chosen element, and click OK to save your changes.

Adding a Quick Part to your document

  1. Place your cursor in a spot where you want to add a Quick Part.
  2. Click Insert > Quick Parts and click on the word, phrase, sentence, or image you want to add to your document.

If you’re looking for other ways to leverage Microsoft Word and other Office apps to boost your productivity, give us a call today.

Did you know? Your Windows computer accumulates files over time, and this can slow down its performance. But don’t fret. You can speed up your computer in minutes by using its Disk Cleanup feature.

What is the Disk Cleanup tool?

Disk Cleanup is a program designed to help users free up storage space on their computer by deleting temporary and any unneeded files that are taking up valuable disk space. These files may include obsolete installation files, log files, internet history and cache, old system error reports and save points, downloaded offline content, etc. that might have been used or created by your system at some point, but are no longer necessary.

This tool can be a big help for those who work with large files or keep track of large amounts of data, as it can easily remove unnecessary clutter from the system so that you have more room for important files.

How to run the Disk Cleanup tool

The Disk Cleanup tool can be accessed in two ways:

  • Option 1: Search “Disk Cleanup” in the Start menu on a Windows PC and select the drive you’d like to clean up.
  • Option 2: Open your computer’s “File Explorer” and right-click on the drive you want to de-clutter. Click on Properties and select Disk Cleanup.

Next, select the file locations you would like to clean up. The Disk Cleanup tool will then automatically determine which files are safe to delete from your system.

Beside each file location, you can see how much hard disk space the selected files occupy. And if you click on the file location, you can view a description of the files so that you know what kind of data will be deleted.

If you need to free up more space, you can also choose to delete system files by clicking on Clean Up System Files. Finally, once you’ve ticked off all the necessary file locations, click OK.

It’s advisable to restart your system when Disk Cleanup is finished to ensure that the unnecessary Windows Update files are removed.

The benefits of Disk Cleanup

When was the last time you used the Disk Cleanup tool? With the benefits listed below, you’d definitely consider performing this essential task on your PC more regularly:

  • Maximize your drive’s memory – Reclaiming precious storage space on your hard drive allows you to prioritize new, important files. You can also take full advantage of other benefits such as increased drive speed and improved performance.
  • Enjoy a more reliable and secure computer – To ensure that your programs are functioning optimally, it’s important to regularly delete redundant and unnecessary files from your system. Cleaning up your cache and search history also ensures that your personal information can’t be accessed by cybercriminals.
  • Promotes efficiency – Disk Cleanup makes decluttering your system simpler and easier. This allows you to focus on more essential tasks.
  • Save money – It’s more cost-efficient to first try and troubleshoot your drive rather than investing in a new one and spending time configuring it.

The next time you are looking for a quick and easy way to improve the speed of your computer, consider using the Disk Cleanup tool. And if you need help managing your IT needs, contact us today to learn more about our IT services.

Do you feel like your Windows PC has been slowing down lately? If yes, it might be due to unnecessary files that have been accumulating on your computer. Thankfully, there’s an easy solution: Disk Cleanup. Read on to learn how you can use Disk Cleanup to speed up your PC.

What is the Disk Cleanup tool?

Disk Cleanup is a program designed to help users free up storage space on their computer by deleting temporary and any unneeded files that are taking up valuable disk space. These files may include obsolete installation files, log files, internet history and cache, old system error reports and save points, downloaded offline content, etc. that might have been used or created by your system at some point, but are no longer necessary.

This tool can be a big help for those who work with large files or keep track of large amounts of data, as it can easily remove unnecessary clutter from the system so that you have more room for important files.

How to run the Disk Cleanup tool

The Disk Cleanup tool can be accessed in two ways:

  • Option 1: Search “Disk Cleanup” in the Start menu on a Windows PC and select the drive you’d like to clean up.
  • Option 2: Open your computer’s “File Explorer” and right-click on the drive you want to de-clutter. Click on Properties and select Disk Cleanup.

Next, select the file locations you would like to clean up. The Disk Cleanup tool will then automatically determine which files are safe to delete from your system.

Beside each file location, you can see how much hard disk space the selected files occupy. And if you click on the file location, you can view a description of the files so that you know what kind of data will be deleted.

If you need to free up more space, you can also choose to delete system files by clicking on Clean Up System Files. Finally, once you’ve ticked off all the necessary file locations, click OK.

It’s advisable to restart your system when Disk Cleanup is finished to ensure that the unnecessary Windows Update files are removed.

The benefits of Disk Cleanup

When was the last time you used the Disk Cleanup tool? With the benefits listed below, you’d definitely consider performing this essential task on your PC more regularly:

  • Maximize your drive’s memory – Reclaiming precious storage space on your hard drive allows you to prioritize new, important files. You can also take full advantage of other benefits such as increased drive speed and improved performance.
  • Enjoy a more reliable and secure computer – To ensure that your programs are functioning optimally, it’s important to regularly delete redundant and unnecessary files from your system. Cleaning up your cache and search history also ensures that your personal information can’t be accessed by cybercriminals.
  • Promotes efficiency – Disk Cleanup makes decluttering your system simpler and easier. This allows you to focus on more essential tasks.
  • Save money – It’s more cost-efficient to first try and troubleshoot your drive rather than investing in a new one and spending time configuring it.

The next time you are looking for a quick and easy way to improve the speed of your computer, consider using the Disk Cleanup tool. And if you need help managing your IT needs, contact us today to learn more about our IT services.

Do you feel like your computer is running slower and slower as time passes? Are some of your programs taking longer to load, or do they seem to hang while you’re trying to use them? If these issues sound familiar, then it’s time for a good Disk Cleanup. In this article, we will show you how to use Disk Cleanup to speed up your Windows PC.

What is the Disk Cleanup tool?

Disk Cleanup is a program designed to help users free up storage space on their computer by deleting temporary and any unneeded files that are taking up valuable disk space. These files may include obsolete installation files, log files, internet history and cache, old system error reports and save points, downloaded offline content, etc. that might have been used or created by your system at some point, but are no longer necessary.

This tool can be a big help for those who work with large files or keep track of large amounts of data, as it can easily remove unnecessary clutter from the system so that you have more room for important files.

How to run the Disk Cleanup tool

The Disk Cleanup tool can be accessed in two ways:

  • Option 1: Search “Disk Cleanup” in the Start menu on a Windows PC and select the drive you’d like to clean up.
  • Option 2: Open your computer’s “File Explorer” and right-click on the drive you want to de-clutter. Click on Properties and select Disk Cleanup.

Next, select the file locations you would like to clean up. The Disk Cleanup tool will then automatically determine which files are safe to delete from your system.

Beside each file location, you can see how much hard disk space the selected files occupy. And if you click on the file location, you can view a description of the files so that you know what kind of data will be deleted.

If you need to free up more space, you can also choose to delete system files by clicking on Clean Up System Files. Finally, once you’ve ticked off all the necessary file locations, click OK.

It’s advisable to restart your system when Disk Cleanup is finished to ensure that the unnecessary Windows Update files are removed.

The benefits of Disk Cleanup

When was the last time you used the Disk Cleanup tool? With the benefits listed below, you’d definitely consider performing this essential task on your PC more regularly:

  • Maximize your drive’s memory – Reclaiming precious storage space on your hard drive allows you to prioritize new, important files. You can also take full advantage of other benefits such as increased drive speed and improved performance.
  • Enjoy a more reliable and secure computer – To ensure that your programs are functioning optimally, it’s important to regularly delete redundant and unnecessary files from your system. Cleaning up your cache and search history also ensures that your personal information can’t be accessed by cybercriminals.
  • Promotes efficiency – Disk Cleanup makes decluttering your system simpler and easier. This allows you to focus on more essential tasks.
  • Save money – It’s more cost-efficient to first try and troubleshoot your drive rather than investing in a new one and spending time configuring it.

The next time you are looking for a quick and easy way to improve the speed of your computer, consider using the Disk Cleanup tool. And if you need help managing your IT needs, contact us today to learn more about our IT services.