Steve Thomas - IT Consultant

Windows 11 is set for a change to the Start menu that’s not been popular in preview, and will surely be even less popular when it makes its full debut in Microsoft’s operating system next week.

The change in question involves a new account manager section that’s been added to the Start menu – though I say added, but the real controversy isn’t so much its addition as the fact that it replaces existing functionality that’s more useful. (Well, not so much replaces as hides, and we’ll come back to that).

Currently, this is part of the most recent preview update (for June, KB5039302 – that packed a nasty bug, incidentally), but that will become the cumulative update for July very soon (next week, in fact, on July 9 which is ‘Patch Tuesday’).

Microsoft explains in a support document for KB5039302: “This update starts the rollout of the new account manager on the Start menu. When you use a Microsoft account to sign in to Windows, you will get a glance at your account benefits. This feature also makes it easy to manage your account settings.”

Windows Latest has experienced the move first-hand, pointing out the differences between how the Start menu acts right now, and how it’ll change next week (in theory).

So, the change is being applied to your profile picture and name, displayed bottom-left of the Start menu. Currently when clicked, this pops up a small menu of options that allow the user to sign out, lock the PC (basically some of the shortcuts you’ll see on the CTRL+ALT+DEL screen).

This has become a new panel which instead gives you Microsoft Account-related settings and reminders, plus info on Microsoft services like OneDrive or Microsoft 365.

As Windows Latest further observes, though, you’ll get prompts about the likes of Microsoft 365 whether you subscribe or not – in fact, part of the drive here is to persuade you to take out a subscription, as a link is provided to discover all the ‘benefits’ of Microsoft 365.

The old functionality hasn’t been entirely replaced here, though, as there’s still a three-dot menu in the top-right corner of the new panel, and clicking this brings up the old options to sign out, lock and so forth.


Unhappy millennial male employee work online on laptop at home office frustrated by gadget error or mistake. Angry young Caucasian man stressed with computer operational problem or breakdown.

(Image credit: Shutterstock / fizkes)

Analysis: Make your opinion known

There are two levels of annoyance here. Firstly, while said sign out options are still present, they’re hidden away, buried a further level down in the menu system so an extra click is required to access them. (Indeed, less observant Windows 11 users may not even notice the three-dot icon).

And secondly, as complainers on Microsoft’s Feedback Hub have pointed out, they don’t want any more Microsoft Account-related shenanigans in Windows 11’s interface. Especially not additions that are another form of adverts, such as pointing out the benefits of Microsoft 365.

Sadly, Microsoft seems to be adding these kinds of ‘recommendations’ all over Windows 11 currently, and this is just another example. What’s particularly surprising for me is that I saw this change in testing in the Dev channel, but suddenly it seems to have leapt to the release version of Windows 11.

Or it will do if Microsoft includes it in the cumulative update for Windows 11 due next week, which seems highly likely. Unless enough people raise objections – so you might want to do your bit on that front if you feel as strongly as I do about this continued messing with the Start menu, or other key parts of the interface like the Settings app, that Microsoft seems increasingly obsessed with.

Note that not all Windows 11 users will see this change straightaway with the July update – if indeed the move does go live as planned – because Microsoft is rolling this one out gradually.

It’s coming, though, unless Windows 11 users can change the software giant’s mind, and as one complainant points out, Microsoft could make one easy switch to alleviate some of the pain here: namely leaving the existing options on the bottom of the new panel, instead of shifting them a layer down the interface, hidden away.

You might also like...

Microsoft is seemingly going backwards with Copilot in Windows 11, and things certainly don’t look great in testing for the AI assistant right now.

Windows Latest spearheads a complaint – echoed elsewhere by other denizens of various forums and social media outlets – that the latest incarnation of Copilot sees Microsoft ‘downgrading’ the AI to a “Microsoft Edge-based web wrapper” (we’ll come back to that point shortly).

To take a step back for a moment, this is all part of Microsoft’s recent move – announced in May 2024, and implemented in June – to switch Copilot from being an assistant anchored to a side panel (on the right) to a full app experience (a window you can move around the desktop, resize and so on, like a normal app basically).

As Windows Latest points out, in the latest update for Windows 11 (in testing), changes that are rolling out to some users turn Copilot into a basic web app – although in fact, Copilot has always been a web app (even when in its previous incarnation as a locked side panel, before the standalone app idea came about).

What the tech site is really complaining about is how basic and transparent Copilot’s nature really is in this freshly deployed take. This means the Copilot window shows Edge menus and options, and just opens copilot.microsoft.com in an Edge tab – and you can even open any old website in the Copilot app with a bit of fudging and a few clicks here and there. And all that feels rather disappointing and basic, of course.


Acer Swift laptop showing the Copilot key

(Image credit: Future / James Holland)

Analysis: Strip it back, then build it up

We get the criticism here, although as noted, all that’s really happening is that Copilot is being more obviously exposed for what it is – a simple web app that basically just pipes you through to the same AI chatbot experience you get with the Copilot website.

However, there is a twist here - namely that the extra options Copilot offered for manipulating Windows 11 settings in some respects (in the pre-standalone app days) have reportedly been ditched. Not that these abilities were any great shakes to begin with – they’ve always been fairly limited – but still, it does feel like a step back to see them vanish.

Ultimately, this leaves the new Copilot experience in Windows 11 feeling very disjointed and not at all well integrated into the OS – just slapped on top, really. However, we do have to remember that this is still in testing.

Stripping features back in preview can be expected – even if it isn’t a pretty sight right now, presumably Microsoft is going to build it back up, make the new Copilot app more seamless, and reintroduce those powers related to Windows settings. In fact, we’d be shocked if that didn’t happen…

Unless Microsoft does have plans to make Copilot a more basic entity in Windows 11, but that seems very unlikely unless many more future AI powers are going to be forked off exclusively for Copilot+ PCs, perhaps (like Recall – which is another controversial topic in itself).

Time will tell, but eventually, we expect Copilot to become a more well-rounded and seamless app, and crucially, when powerful NPUs become more widespread, the AI assistant will be able to perform a good deal more AI workloads on-device (rather than hooking up to the cloud to get the necessary processing power). That’s when a more fully-fledged app with greater powers to operate locally will likely become a reality.

In its current format, though, which has always been pretty basic, Copilot in Windows 11 doesn’t really need to be any more than a simple web wrapper.

You might also like...

Windows 11 just got its latest update, but Microsoft has put it on hold following the discovery of a bug that’s seriously bad news.

This is the KB5039302 update, which is an optional download for Windows 11 22H2 and 23H2, so it’s still in preview, ahead of its release as the cumulative update for July 2024 next month.

The showstopper of a bug puts affected PCs into what’s known as ‘reboot hell’ whereby the PC keeps failing to start, rebooting, failing again, then rebooting, and so on ad infinitum – well, until the user intervenes and tries to initiative a recovery. (Or in some cases, unplugs their PC out of frustration, no doubt – never do this if you can at all avoid it, we should add, as cutting power at the wrong time can be bad news for your system drive, as it could corrupt files potentially).

What’s the root cause here? Well, it appears to have something to do with PCs using virtual machines (running another OS inside the current operating system, essentially).

Neowin noticed that in its release health dashboard, where this gremlin has been flagged up, Microsoft tells us: “This issue is more likely to affect devices utilizing virtual machines tools and nested virtualization features, such as CloudPC, DevBox, Azure Virtual Desktop. We are investigating to determine the precise conditions under which this issue can trigger.”

While that investigation is taking place, Microsoft has paused this update, so it won’t be offered to Windows 11 home users or businesses.


Unhappy millennial male employee work online on laptop at home office frustrated by gadget error or mistake. Angry young Caucasian man stressed with computer operational problem or breakdown.

(Image credit: Shutterstock / fizkes)

Analysis: Room for doubt

Clearly, given that having a PC trapped in a reboot loop is a dire scenario, it’s a good idea that Microsoft has pulled this update until the firm can work out what’s really going on here. This is an optional update anyway, so it’s not like KB5039302 is crucial, or even finished – which is why this flaw is present, no doubt.

Although you’d really have hoped Microsoft would have picked up on such a calamitous bug before the final preview release of the update – but at least it’s being fixed now. This also goes to illustrate why it’s always a risk to download an optional update for Windows 11 – we’d recommend steering clear of these in case there is a last-minute showstopper, just like this glitch.

Granted, as Microsoft observes: “Users of Windows Home edition are less likely to experience this issue, as virtualization is less common in home environments.”

Even so, some Windows 11 Home users will use virtualization features, no doubt, and Microsoft isn’t 100% clear about the bug not affecting other PCs either. The language used is that the problem is “more likely” to hit PCs using virtual machines in some way, leaving room for doubt that it could affect other systems too. This is likely why the update has been retracted, for now, we’d wager.

The crucial thing is that Microsoft fixes this one up, or at least pushes the feature or code that’s caused the problem aside, before the full release of the July 2024 cumulative update, clearly enough.

You might also like...

Windows 11 has a new bug (that’s also in Windows 10) whereby the operating system keeps telling users that their time zone has changed, when it hasn’t – and repeatedly doing this, driving some users to the point of distraction by all accounts.

Windows Latest flagged up multiple complaints about this bug, which has been acknowledged by Microsoft, and the company is now working on a fix.

Indeed, the tech site notes that it has experienced the glitch itself, whereby a dialog box pops up, warning that “due to a location change a new time zone has been detected.”

Then the user has the choice of clicking ‘Ignore’ to dismiss the prompt, or ‘Accept’ to be taken to the Date & Time settings where there’s actually nothing amiss (the time zone and location aren’t changed, just to clarify).

Essentially, the prompt is appearing by accident, but the real problem is that affected users don’t just see this once. It’s occurring repeatedly and in some cases multiple times per day, or even hour, which is going to get seriously tiresome.

A user hit by the problem complained in Microsoft’s Feedback Hub: “This is the 2nd system where this pop-up about me changing time zones has occurred. After I set the date and time (Central time zone), why does Windows think that I have moved 455 miles to the East? Fix your darn OS Microsoft.”


Analysis: A rare bug apparently – but a seriously annoying glitch

This is a bit of an odd one, to say the least, and while it’s a relatively benign bug – an errant pop-up that doesn’t actually throw anything of a spanner in the works (unlike some of the showstoppers we’ve seen in the past) – if it’s happening regularly, then it’s going to be a headache.

The good news is that Microsoft says the bug is rare, and so presumably the set of Windows 11 and 10 users who are subject to it happening particularly regularly is even rarer. That said, it needs to be fixed, and the problem has been around for a few weeks now.

According to Windows Latest, the fix is already in the pipeline and should (most likely) be applied as a server-side solution, meaning that it’ll happen on Microsoft’s end, and you won’t need to wait for an update to contain the cure if you’re affected by this issue. Fingers crossed that this resolution arrives swiftly, then.

Meantime, if you’re getting these head-scratching time zone notifications, there’s nothing you can do but keep dismissing them.

You might also like...

Businesses need webcams to conduct remote meetings and online conferences, but these devices can also pose a significant security risk if not properly protected. It’s therefore important to be proactive in securing your webcam to prevent any potential breaches of confidentiality and sensitive information. This guide will provide comprehensive steps on how to secure your webcam on Windows computers.

Check the webcam LEDs

One of the simplest ways to detect unauthorized access to your webcam is by checking its LED indicator. Built-in webcams usually have a small LED that lights up when it’s in use. If the light is on without your knowledge or consent, it could indicate that unauthorized users or software are accessing your device. The moment you notice this, it’s vital to act fast and secure your webcam before any further damage is done.

Use privacy shutters or webcam covers

Investing in a privacy shutter or webcam cover is an easy way to protect your privacy. These covers effectively block the camera even if it’s hacked, giving you peace of mind. They are especially useful for those who use their work laptop in private areas. Alternatively, you can simply tape a piece of paper or sticky note over the camera when not in use.

Update your software

Over time, Windows operating systems and software develop vulnerabilities that hackers can exploit. Webcam firmware and drivers, in particular, could have security flaws that allow unauthorized access to your camera. To prevent this, make sure you regularly update your operating system and software to the latest versions. You should also enable automatic updates to keep your system up to date and secure.

Run anti-malware scans

Malicious software such as spyware can gain access to your webcam and monitor your activities without your knowledge. That’s why you should have an active anti-malware program installed on your computer. Regularly running scans can help detect and remove any potential threats, ensuring the security of your webcam and overall system. Also, you should update your anti-malware software with the latest virus definitions for maximum protection.

Watch out for phishing scams

Phishing emails are often packed with malicious software designed to steal personal information or gain access to different parts of your computer, including your webcam. To avoid falling victim to these scams, be cautious when opening emails from unknown senders or clicking on suspicious links. When in doubt, it’s best to delete the email and report it as spam.

Change app permissions

Many apps on Windows devices will ask for permission to access your webcam. However, not all of these apps are trustworthy, and some may abuse the access privileges you unwittingly granted. To prevent this, regularly review and change the app permissions on your device. You can do this by going to Settings > Privacy & security > Camera and disabling access for any apps you don’t trust or use frequently. Regularly review this list to make sure only trusted apps have access to your webcam.

Unplug external webcams

If you use an external webcam, unplug it when it’s not in use. This simple step can prevent unauthorized access and ensure that your webcam is only active when you want it to be. By disconnecting the device, you effectively eliminate the risk of remote activation.

Disable webcams through UEFI

If you don’t use your webcam at all, you can disable it through your computer’s Unified Extensible Firmware Interface (UEFI) settings. You can access these settings by restarting your computer and pressing the designated key (Esc, Delete, F1, F2, F10, F11, or F12) during startup. From there, navigate to the advanced settings and disable the webcam from the list of devices. This step ensures that even if hackers gain access to your computer and operating system, they won’t be able to use your webcam.

Your privacy is invaluable, and taking steps to protect your webcam is a crucial part of safeguarding your personal information. For more comprehensive insights and updates on maintaining your digital privacy and security, call us today.

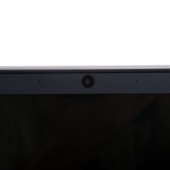
Webcam hacking has become a serious issue in recent years. Hackers can gain access to your webcam without your knowledge, allowing them to monitor your activities, record private conversations or take compromising photos or videos. This invasion of privacy can have devastating consequences for individuals and businesses alike. Fortunately, there are many settings and countermeasures on Windows devices that can safeguard your webcam from potential threats.

Check the webcam LEDs

One of the simplest ways to detect unauthorized access to your webcam is by checking its LED indicator. Built-in webcams usually have a small LED that lights up when it’s in use. If the light is on without your knowledge or consent, it could indicate that unauthorized users or software are accessing your device. The moment you notice this, it’s vital to act fast and secure your webcam before any further damage is done.

Use privacy shutters or webcam covers

Investing in a privacy shutter or webcam cover is an easy way to protect your privacy. These covers effectively block the camera even if it’s hacked, giving you peace of mind. They are especially useful for those who use their work laptop in private areas. Alternatively, you can simply tape a piece of paper or sticky note over the camera when not in use.

Update your software

Over time, Windows operating systems and software develop vulnerabilities that hackers can exploit. Webcam firmware and drivers, in particular, could have security flaws that allow unauthorized access to your camera. To prevent this, make sure you regularly update your operating system and software to the latest versions. You should also enable automatic updates to keep your system up to date and secure.

Run anti-malware scans

Malicious software such as spyware can gain access to your webcam and monitor your activities without your knowledge. That’s why you should have an active anti-malware program installed on your computer. Regularly running scans can help detect and remove any potential threats, ensuring the security of your webcam and overall system. Also, you should update your anti-malware software with the latest virus definitions for maximum protection.

Watch out for phishing scams

Phishing emails are often packed with malicious software designed to steal personal information or gain access to different parts of your computer, including your webcam. To avoid falling victim to these scams, be cautious when opening emails from unknown senders or clicking on suspicious links. When in doubt, it’s best to delete the email and report it as spam.

Change app permissions

Many apps on Windows devices will ask for permission to access your webcam. However, not all of these apps are trustworthy, and some may abuse the access privileges you unwittingly granted. To prevent this, regularly review and change the app permissions on your device. You can do this by going to Settings > Privacy & security > Camera and disabling access for any apps you don’t trust or use frequently. Regularly review this list to make sure only trusted apps have access to your webcam.

Unplug external webcams

If you use an external webcam, unplug it when it’s not in use. This simple step can prevent unauthorized access and ensure that your webcam is only active when you want it to be. By disconnecting the device, you effectively eliminate the risk of remote activation.

Disable webcams through UEFI

If you don’t use your webcam at all, you can disable it through your computer’s Unified Extensible Firmware Interface (UEFI) settings. You can access these settings by restarting your computer and pressing the designated key (Esc, Delete, F1, F2, F10, F11, or F12) during startup. From there, navigate to the advanced settings and disable the webcam from the list of devices. This step ensures that even if hackers gain access to your computer and operating system, they won’t be able to use your webcam.

Your privacy is invaluable, and taking steps to protect your webcam is a crucial part of safeguarding your personal information. For more comprehensive insights and updates on maintaining your digital privacy and security, call us today.

Webcams are a staple feature in modern computing devices, allowing users to connect with others through video calls, conferences and live streaming. While these built-in cameras offer convenience and connectivity, they may also pose a threat to digital privacy. Here’s a quick guide to help you secure your webcam and protect your privacy.

Check the webcam LEDs

One of the simplest ways to detect unauthorized access to your webcam is by checking its LED indicator. Built-in webcams usually have a small LED that lights up when it’s in use. If the light is on without your knowledge or consent, it could indicate that unauthorized users or software are accessing your device. The moment you notice this, it’s vital to act fast and secure your webcam before any further damage is done.

Use privacy shutters or webcam covers

Investing in a privacy shutter or webcam cover is an easy way to protect your privacy. These covers effectively block the camera even if it’s hacked, giving you peace of mind. They are especially useful for those who use their work laptop in private areas. Alternatively, you can simply tape a piece of paper or sticky note over the camera when not in use.

Update your software

Over time, Windows operating systems and software develop vulnerabilities that hackers can exploit. Webcam firmware and drivers, in particular, could have security flaws that allow unauthorized access to your camera. To prevent this, make sure you regularly update your operating system and software to the latest versions. You should also enable automatic updates to keep your system up to date and secure.

Run anti-malware scans

Malicious software such as spyware can gain access to your webcam and monitor your activities without your knowledge. That’s why you should have an active anti-malware program installed on your computer. Regularly running scans can help detect and remove any potential threats, ensuring the security of your webcam and overall system. Also, you should update your anti-malware software with the latest virus definitions for maximum protection.

Watch out for phishing scams

Phishing emails are often packed with malicious software designed to steal personal information or gain access to different parts of your computer, including your webcam. To avoid falling victim to these scams, be cautious when opening emails from unknown senders or clicking on suspicious links. When in doubt, it’s best to delete the email and report it as spam.

Change app permissions

Many apps on Windows devices will ask for permission to access your webcam. However, not all of these apps are trustworthy, and some may abuse the access privileges you unwittingly granted. To prevent this, regularly review and change the app permissions on your device. You can do this by going to Settings > Privacy & security > Camera and disabling access for any apps you don’t trust or use frequently. Regularly review this list to make sure only trusted apps have access to your webcam.

Unplug external webcams

If you use an external webcam, unplug it when it’s not in use. This simple step can prevent unauthorized access and ensure that your webcam is only active when you want it to be. By disconnecting the device, you effectively eliminate the risk of remote activation.

Disable webcams through UEFI

If you don’t use your webcam at all, you can disable it through your computer’s Unified Extensible Firmware Interface (UEFI) settings. You can access these settings by restarting your computer and pressing the designated key (Esc, Delete, F1, F2, F10, F11, or F12) during startup. From there, navigate to the advanced settings and disable the webcam from the list of devices. This step ensures that even if hackers gain access to your computer and operating system, they won’t be able to use your webcam.

Your privacy is invaluable, and taking steps to protect your webcam is a crucial part of safeguarding your personal information. For more comprehensive insights and updates on maintaining your digital privacy and security, call us today.

Microsoft has confirmed that the superfast wireless speeds that have arrived courtesy of Wi-Fi 7 – for devices and routers with support – will only be coming to the very latest version of Windows 11.

That’d be Windows 11 24H2, of course, and as you might know, this version is only currently available for Copilot+ PCs, but the big update for 2024 will roll out to all Windows 11 users later this year (maybe in September).

For now, though, the new Wi-Fi support is for Copilot+ PCs only, as Windows Latest spotted a Microsoft support document that confirmed this.

In the document on the latest wireless technology in Windows, Microsoft states: “Wi-Fi 7 is available starting with Windows 11, version 24H2.”

Now, that doesn’t mean that Wi-Fi 7 will always be limited to that specific incarnation of Windows 11 – 24H2 (or later) – just that Microsoft is kicking off availability with this version. It might be the case that it’s added to earlier versions of Windows 11 (well, 23H2) before too long.

However, it looks like Windows 10 users are out of luck though, as there’s no mention of the OS – as was the case with Wi-Fi 6E, the advancement on Wi-Fi 6 that previously came through.


Analysis: Wi-Fi 6E misstep unlikely to happen again

So, it seems like Wi-Fi 7 won’t debut for Windows 10, but that isn’t really a massive surprise. Firstly, Windows 10 runs out of support in not that much more than a year now, so it’s going to be limited in terms of new features being introduced anyway (though there will be some new additions into the mix, we know that much – enough to prompt Microsoft to resurrect the Beta testing channel for the OS).

And secondly, Windows 10 didn’t get Wi-Fi 6E as noted above, so it seems unlikely that it’d receive Wi-Fi 7 support. We can’t completely rule it out, of course – as it’s not explicitly stated that Windows 10 won’t – but that seems to be the heavy hint Microsoft is dropping by only mentioning Windows 11 versions.

Now, there is a slight twist here, in that Windows 10 did receive Wi-Fi 6E in what seemed to be a mistake with a single Intel driver that erroneously added support (somehow) – but that driver is reportedly buggy and not to be used (if you can find it at all). So, you could hope this might happen with Wi-Fi 7, but we’re betting it won’t – and Intel has learned from this mistake.

In short, don’t expect speedy Wi-Fi 7 for Windows 10, and of course remember that even on Windows 11, you need a router and PC that supports the new wireless standard to benefit from Wi-Fi 7.

You might also like...

Microsoft has seemingly pulled its Recall feature – the AI-powered search that screenshots your PC activity and has caused controversy aplenty – not just from Copilot+ PCs at launch, but now from Windows 11 test builds, too.

If you cast your mind back to a week ago, June 14, Microsoft came forth with an announcement that Recall had been withdrawn from Copilot+ PCs, where it was supposed to be in ‘preview’ at launch, and would instead be available to preview in the “Windows Insider Program (WIP) in the coming weeks.”

In other words, Windows test builds – but of course, the mention of the ‘coming weeks’ suggests that testing of the feature won’t happen immediately in the Canary channel (or other preview channels for that matter).

Still, as Tom’s Hardware observes, Recall functionality was present in build 26236 in the Canary channel – with well-known leaker Albacore uncovering new pieces of functionality – and then, on the day of the launch of Copilot+ PCs, that build had its rollout paused by Microsoft.

Following that, build 26241 emerged in Canary testing, and as Tom’s makes clear, it has no sign of the Recall feature – it has all been stripped out.


Analysis: Recall won’t be ready until it’s ready – and that’s a good thing

Really, then, this is to be expected. As we noted above, Microsoft has said Recall is going into testing, but only in the coming weeks, hinting it’s still a little way off reaching that point. But it’s still interesting to see that Microsoft has stripped it out completely in the Canary channel, after pausing the preview build which had the feature (albeit with changes discovered by Albacore that were hidden in the background).

To us, this indicates that it might be a bit more of a long haul than Microsoft suggests for Recall actually going live even in test builds of Windows 11. But frankly – if this turns out to be the case – we think that’s something to be grateful for, being very much of the opinion that Recall likely isn’t remotely ready yet.

If Microsoft is taking the time to pull it completely, and really get the Recall house in order, before deploying it to Windows 11 testers, that’s a good sign. It’s a kingpin AI feature for Copilot+ PCs, after all, so Microsoft needs to get Recall right, and if that takes time, all well and good as far as we’re concerned.

You might also like...

What’s going to drive Copilot+ PC sales, do you think? Superb AI acceleration chops? Windows on Arm getting emulation nailed for fast app and gaming performance (on Snapdragon X models)? No – it’s the Copilot key on the keyboard, dummy.

Surprised? Well, we certainly are, but apparently one of Microsoft’s selling points for Copilot+ PCs is the dedicated key to summon the AI on the keyboard.

We can draw that unexpected conclusion from a move Microsoft just made which seems pretty mystifying otherwise: namely the removal of the keyboard shortcut for Copilot from Windows 11.

As flagged up by Tom’s Hardware, the new Windows 11 preview (build 22635) in the Beta channel has dumped the keyboard shortcut (Windows key + C) that brings up the Copilot panel. This is an update that just happened (on June 19), after the preview build initially emerged on June 14.

Microsoft explains very vaguely that: “As part of the Copilot experience’s evolution on Windows to become an app that is pinned to the taskbar, we are retiring the WIN + C keyboard shortcut.”


An Acer Swift Go 14 on a desk

(Image credit: Future / James Holland)

Analysis: A cynical move by Microsoft?

What now? How is removing a useful keyboard shortcut part of the ‘evolution’ of Copilot? Surely, it’s a step backwards to drop one of the ways to invoke the AI assistant to the desktop?

Now, if Microsoft had big plans for the Windows + C shortcut elsewhere, say another piece of functionality that had come in which required this particular combo, the reasoning might at least be a little clearer. But by all accounts, there’s no replacement function here – Windows + C now does nothing.

As for the reason somehow being tied to Copilot shifting to become an app window, rather than a locked side panel in Windows 11, we don’t see how that has any relevance at all to whether you can open the AI with a keyboard shortcut or not.

As Tom’s Guide points out, seemingly the driver for this change is to make the Copilot key on the keyboard a more pivotal function, replacing the shortcut, but guess what – you only get that key on new Copilot+ PCs (right now anyway). So, the logical conclusion for the skeptical is that this is simply a fresh angle on helping to stoke sales for Copilot+ PCs.

It’s not like you can’t just click on the Copilot icon, of course, so you’re not lost at sea with no AI assistance all of a sudden – but that’s not the point. It is a lost convenience, clearly though, and it feels like a cynical move by Microsoft.

Tom’s Guide points out that you could use third-party key mapping software to restore the functionality of this particular shortcut, but the point is, you really shouldn’t have to bother jumping through such hoops. Come on, Microsoft – don’t pull stunts like this, or, if there is a good reason behind the change, share it, not some waffling soundbites about evolving Copilot.

You might also like...

Windows 11 could put your iPhone or Android device right into the heart of the Start menu, in a manner of speaking – or at least the Phone Link app is apparently headed this way.

That’s according to clues unearthed by MS Power User, which reported on whispers from Windows 11 testers to the effect that Phone Link is set to be made into a Start menu ‘Companion.’

If you’ve missed the Companion panel appearing in Windows preview builds last month, it’s a floating panel that can be docked to the left or right of the Start menu. The Companions it plays host to are a bit like Live Tiles of old, widget-style affairs that display real-time info which is piped through.

In theory, Phone Link will be one of the apps that’ll appear in the Companion panel, as MS Power User took a deep dive into files from Phone Link and found a number of code strings relating to ‘StartMenuCompanion’ settings.


Analysis: Dialing up the work on phone integration

This would appear to be the groundwork for Phone Link to become a Start menu Companion, but of course, this is just work hidden in testing right now – and we can’t take it for granted this will happen. Indeed, the Companion panel itself might be abandoned yet if Microsoft thinks better of it – only time will tell.

Given the rumors, and at least some concrete evidence that Phone Link will get this treatment, it seems more likely to happen than not, on balance. Phone Link would also be a logical and useful app to have in the Companion panel, in order to pipe notifications through from your smartphone, bringing them to your attention when you’re in the Start menu.

Phone Link has been a key part of Windows for some time now, and it’s not surprising Microsoft is pushing ahead with potential features like this – and work on the Cross-Device Experience Host (albeit that has stumbled of late) and other phone-related capabilities besides – given that Apple now has iPhone Mirroring inbound with macOS Sequoia.

Whichever way you dice it, smartphones are becoming more and more deeply integrated into desktop operating systems these days.

You might also like...

Microsoft has acknowledged that there’s a bug introduced by recent Windows 10 updates that can break a piece of taskbar functionality – but the good news is a fix is in the works.

The problem is evident for some Windows 10 users when right clicking on a pinned app on the taskbar, when instead of seeing the usual context-sensitive jump list menu – that allows access to common features, like opening recent files – they get something entirely useless.

What Windows 10 produces instead is the ‘Open with…’ menu (that facilitates choosing which app you want to open a file with). That’s not only unhelpful but also confusing, frankly, though Windows Latest, which spotted this, notes that the bug only affects a small set of Windows 10 users – and it only happens with some apps, not all of them.

So, this isn’t something you’re likely to encounter, but if you do, it’s a rather annoying issue. Furthermore, it affects a wide range of recent updates for Windows 10 – not just the latest June cumulative update, but also the May cumulative update (and that month’s optional update), and the optional update for April too.

Windows Latest reports that Microsoft has pinpointed a fix and the company has indicated that the resolution will be included in a future update for Window 10 22H2.


Analysis: A quick fix, with any luck

Hopefully, with the fix identified, implementing it shouldn’t be a difficult task and we might see the cure in next month’s cumulative update. Indeed, if that’s the case, we’ll actually get it before the July update, as it will be in the optional update for June, which is a preview of the former. That should be here in not much more than a week, in fact – though there’s no guarantee the fix won’t take longer, of course.

In case you missed it, what’s interesting with Windows 10 is that Microsoft is not just fixing and patching the OS, but is actively developing it again, adding new features and recently resurrecting the Beta channel to test them. That’s despite the End of Life date for Windows 10 coming ever closer – the OS runs out of support in October 2025, in case you’d forgotten. So it won’t be that long before you need to start exploring the options you have in that regard.

You might also like...