Steve Thomas - IT Consultant

For years, Microsoft Exchange Server has been the go-to choice for businesses looking to manage their emails, contacts, and calendars efficiently. However, small businesses often saw the complex setup and maintenance of an on-premises server as too daunting and costly. With the introduction of Exchange Online, Microsoft has created a powerful cloud solution that offers the same features and reliability as Exchange Server, but without all of the hassle. Here’s why your small business should consider Exchange Online for your email needs.

What is Microsoft Exchange?

Before we dive into the benefits of Exchange Online, let’s quickly review what Microsoft Exchange is. Microsoft Exchange is an email, calendar, and contact management system designed to provide powerful collaboration and communication tools for organizations of all sizes. It can be used on premises, in the cloud, or as part of a hybrid environment.

Many large enterprises and academic organizations install Exchange on their own servers, as this provides them with complete control over their email systems. However, this can be overly complex and expensive for smaller businesses that don’t necessarily require the same degree of customization or control. This is where Exchange Online comes in.

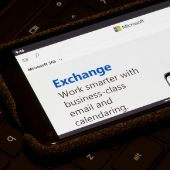
What is Exchange Online?

Exchange Online is essentially the cloud-based version of Microsoft Exchange, and it’s available as a stand-alone service or as part of a Microsoft 365 subscription. Exchange Online is hosted by Microsoft, meaning you don’t have to worry about setting up and managing your own email servers. This makes it much simpler and more cost-effective to set up than an on-premises Exchange server. All you need is an internet connection and you’re good to go.

What are the benefits of Exchange Online?

Using Exchange Online for your business email comes with a number of advantages, including these key benefits:

  • Predictable and lower costs – Exchange Online eliminates the need for expensive hardware and software investments, as well as the ongoing maintenance costs associated with an on-premises installation. As with many other hosted services, you simply pay a fixed fee each month for the number of users you need, so you can easily predict and control your costs.
  • Easier implementation – Maintaining an on-premises Exchange server can be complex and time-consuming. You would need to find space in your office for the server, purchase and install hardware and software, set up and manage accounts and users, and keep it all updated and secure. In case the server runs into problems, you would then need to fix it yourself or call in an IT specialist. Exchange Online takes much of this burden away, as Microsoft takes care of everything.
  • Enhanced security – Microsoft’s cloud infrastructure provides a secure platform for storing and managing your data. Exchange Online also includes advanced security features such as multifactor authentication, data loss prevention, and encryption. These features help protect your business from cyberthreats and data breaches.
  • Scalability – As your business grows, Exchange Online can quickly and easily scale to meet the increased demand. Instead of needing to purchase new hardware or hire additional IT staff, you can simply increase your user count and the system will take care of the rest.

Are you ready to discover how Exchange Online can help your business succeed? Connect with one of our specialists today.

Windows 11 offers a remarkable user experience with its impressive visuals, stylish animations, and amazing features. Unfortunately, the high system requirements needed for all these new features have resulted in a significant decrease in overall computer performance. In this blog post, we provide you with the steps to adjust your Windows 11 settings and improve its speed and performance.

Make sure you have the latest Windows updates and device drivers

Keeping your Windows 11 updated will ensure you have the latest device drivers, which are vital in boosting your computer’s performance. To check for the latest Windows 11 updates, follow the instructions below:

  1. Go to Start > Settings > Windows update > Check for updates.
  2. Choose one of the following options:
    • If your computer is up to date, then continue checking for optional updates.
    • If the system says “Updates are available once they are downloaded”, click on Install now.
  3. Choose the updates you want to install, and click Install.
  4. Restart your computer.

When checking for optional updates, follow these steps:

  1. Go to Start > Settings > Windows update > Advanced options > Optional updates.
  2. If optional updates are available, select the ones you need and click Download & Install.
  3. Restart your computer.

Use ReadyBoost

ReadyBoost enables you to enhance your computer’s speed and effectiveness without having to upgrade its physical memory. All you need is a removable drive like a USB flash drive with at least 500 MB of free space and a high data transfer rate. Here are the steps for using ReadyBoost.

  1. Insert a USB flash drive into your computer.
  2. Click on the File Explorer icon on the taskbar.
  3. Right-click on the USB flash drive and choose Properties.
  4. Click on the ReadyBoost tab and choose Use this device. Windows will check if the USB drive can use ReadyBoost, and will inform you if it can’t.
  5. After Windows calculates the amount of free space needed to optimize memory, click OK to reserve this space for ReadyBoost.

Take note that you can’t use ReadyBoost if you installed Windows 11 on a solid state drive (SSD). This is because SSDs are already fast, and ReadyBoost will have little to no effect on their performance.

Adjust the visual settings of Windows 11

Windows 11 uses animations, shadows, and other visual effects for some of its elements. While these make the UI appear more fluid, they require additional system resources which can reduce overall performance, especially if your computer has limited memory. Here’s how you can adjust the visual settings of Windows 11 for better performance.

  1. Click on Search on the taskbar and type performance.
  2. On the search results page, choose Adjust the appearance and performance of Windows.
  3. On the Visual effects tabs, choose Adjust for best performance, then click on Apply.
  4. Restart your computer.

Disable startup programs you don’t use

When you turn on your computer, some applications start automatically and run in the background. This is convenient for programs that are used often, but programs that are hardly used can increase the booting time of Windows 11. To fix this issue, you can disable any unused programs during startup by following these steps:

  1. Go to Start > Settings > Apps > Startup.
  2. On the Startup Apps page, select the programs you don’t want to start automatically and set the button next to them to Off.

Check for malware

A virus or malware can have a negative impact on your computer’s performance. The signs of an infection include pop-up messages, programs that start on their own, and the hard drive constantly running in the background.

You can use Windows Security (formerly Windows Defender Security Center) to scan your computer for signs of a malware infection. Just follow these steps:

  1. Go to Start > Settings > Privacy & Security > Windows Security > Open Windows Security.
  2. Click on Virus & threat protection > Protection updates.
  3. Click on Check for updates to ensure you have the latest updates.
  4. Go back to the Virus & threat protection screen and choose Quick Scan, then wait for Windows to finish scanning.

If Windows finds a virus or malware, it will ask you to either remove or quarantine it. In case the virus or malware can’t be removed or quarantined, you should contact Microsoft support for additional assistance. If you’re using third-party antivirus software, you should refer to that program’s documentation on how to scan and remove malware from your computer.

For more tips on how to optimize Windows, give our experts a call today.

Microsoft Windows 11 is filled with useful features. However, some users have experienced decreased performance on their PCs or laptops after upgrading from Windows 10. In this article, we’ll give you tips on how to optimize the speed and performance of your Windows 11 computer.

Make sure you have the latest Windows updates and device drivers

Keeping your Windows 11 updated will ensure you have the latest device drivers, which are vital in boosting your computer’s performance. To check for the latest Windows 11 updates, follow the instructions below:

  1. Go to Start > Settings > Windows update > Check for updates.
  2. Choose one of the following options:
    • If your computer is up to date, then continue checking for optional updates.
    • If the system says “Updates are available once they are downloaded”, click on Install now.
  3. Choose the updates you want to install, and click Install.
  4. Restart your computer.

When checking for optional updates, follow these steps:

  1. Go to Start > Settings > Windows update > Advanced options > Optional updates.
  2. If optional updates are available, select the ones you need and click Download & Install.
  3. Restart your computer.

Use ReadyBoost

ReadyBoost enables you to enhance your computer’s speed and effectiveness without having to upgrade its physical memory. All you need is a removable drive like a USB flash drive with at least 500 MB of free space and a high data transfer rate. Here are the steps for using ReadyBoost.

  1. Insert a USB flash drive into your computer.
  2. Click on the File Explorer icon on the taskbar.
  3. Right-click on the USB flash drive and choose Properties.
  4. Click on the ReadyBoost tab and choose Use this device. Windows will check if the USB drive can use ReadyBoost, and will inform you if it can’t.
  5. After Windows calculates the amount of free space needed to optimize memory, click OK to reserve this space for ReadyBoost.

Take note that you can’t use ReadyBoost if you installed Windows 11 on a solid state drive (SSD). This is because SSDs are already fast, and ReadyBoost will have little to no effect on their performance.

Adjust the visual settings of Windows 11

Windows 11 uses animations, shadows, and other visual effects for some of its elements. While these make the UI appear more fluid, they require additional system resources which can reduce overall performance, especially if your computer has limited memory. Here’s how you can adjust the visual settings of Windows 11 for better performance.

  1. Click on Search on the taskbar and type performance.
  2. On the search results page, choose Adjust the appearance and performance of Windows.
  3. On the Visual effects tabs, choose Adjust for best performance, then click on Apply.
  4. Restart your computer.

Disable startup programs you don’t use

When you turn on your computer, some applications start automatically and run in the background. This is convenient for programs that are used often, but programs that are hardly used can increase the booting time of Windows 11. To fix this issue, you can disable any unused programs during startup by following these steps:

  1. Go to Start > Settings > Apps > Startup.
  2. On the Startup Apps page, select the programs you don’t want to start automatically and set the button next to them to Off.

Check for malware

A virus or malware can have a negative impact on your computer’s performance. The signs of an infection include pop-up messages, programs that start on their own, and the hard drive constantly running in the background.

You can use Windows Security (formerly Windows Defender Security Center) to scan your computer for signs of a malware infection. Just follow these steps:

  1. Go to Start > Settings > Privacy & Security > Windows Security > Open Windows Security.
  2. Click on Virus & threat protection > Protection updates.
  3. Click on Check for updates to ensure you have the latest updates.
  4. Go back to the Virus & threat protection screen and choose Quick Scan, then wait for Windows to finish scanning.

If Windows finds a virus or malware, it will ask you to either remove or quarantine it. In case the virus or malware can’t be removed or quarantined, you should contact Microsoft support for additional assistance. If you’re using third-party antivirus software, you should refer to that program’s documentation on how to scan and remove malware from your computer.

For more tips on how to optimize Windows, give our experts a call today.

If you’ve made the switch to Windows 11, then you are familiar with its new features, effects, and animations. You’ve also probably noticed that upgrading to Windows 11 resulted in a decrease in PC performance. To help improve your system’s speed and optimize your Windows 11 experience, follow the useful tips and tricks we’ve outlined below.

Make sure you have the latest Windows updates and device drivers

Keeping your Windows 11 updated will ensure you have the latest device drivers, which are vital in boosting your computer’s performance. To check for the latest Windows 11 updates, follow the instructions below:

  1. Go to Start > Settings > Windows update > Check for updates.
  2. Choose one of the following options:
    • If your computer is up to date, then continue checking for optional updates.
    • If the system says “Updates are available once they are downloaded”, click on Install now.
  3. Choose the updates you want to install, and click Install.
  4. Restart your computer.

When checking for optional updates, follow these steps:

  1. Go to Start > Settings > Windows update > Advanced options > Optional updates.
  2. If optional updates are available, select the ones you need and click Download & Install.
  3. Restart your computer.

Use ReadyBoost

ReadyBoost enables you to enhance your computer’s speed and effectiveness without having to upgrade its physical memory. All you need is a removable drive like a USB flash drive with at least 500 MB of free space and a high data transfer rate. Here are the steps for using ReadyBoost.

  1. Insert a USB flash drive into your computer.
  2. Click on the File Explorer icon on the taskbar.
  3. Right-click on the USB flash drive and choose Properties.
  4. Click on the ReadyBoost tab and choose Use this device. Windows will check if the USB drive can use ReadyBoost, and will inform you if it can’t.
  5. After Windows calculates the amount of free space needed to optimize memory, click OK to reserve this space for ReadyBoost.

Take note that you can’t use ReadyBoost if you installed Windows 11 on a solid state drive (SSD). This is because SSDs are already fast, and ReadyBoost will have little to no effect on their performance.

Adjust the visual settings of Windows 11

Windows 11 uses animations, shadows, and other visual effects for some of its elements. While these make the UI appear more fluid, they require additional system resources which can reduce overall performance, especially if your computer has limited memory. Here’s how you can adjust the visual settings of Windows 11 for better performance.

  1. Click on Search on the taskbar and type performance.
  2. On the search results page, choose Adjust the appearance and performance of Windows.
  3. On the Visual effects tabs, choose Adjust for best performance, then click on Apply.
  4. Restart your computer.

Disable startup programs you don’t use

When you turn on your computer, some applications start automatically and run in the background. This is convenient for programs that are used often, but programs that are hardly used can increase the booting time of Windows 11. To fix this issue, you can disable any unused programs during startup by following these steps:

  1. Go to Start > Settings > Apps > Startup.
  2. On the Startup Apps page, select the programs you don’t want to start automatically and set the button next to them to Off.

Check for malware

A virus or malware can have a negative impact on your computer’s performance. The signs of an infection include pop-up messages, programs that start on their own, and the hard drive constantly running in the background.

You can use Windows Security (formerly Windows Defender Security Center) to scan your computer for signs of a malware infection. Just follow these steps:

  1. Go to Start > Settings > Privacy & Security > Windows Security > Open Windows Security.
  2. Click on Virus & threat protection > Protection updates.
  3. Click on Check for updates to ensure you have the latest updates.
  4. Go back to the Virus & threat protection screen and choose Quick Scan, then wait for Windows to finish scanning.

If Windows finds a virus or malware, it will ask you to either remove or quarantine it. In case the virus or malware can’t be removed or quarantined, you should contact Microsoft support for additional assistance. If you’re using third-party antivirus software, you should refer to that program’s documentation on how to scan and remove malware from your computer.

For more tips on how to optimize Windows, give our experts a call today.

Has your computer been a little sluggish lately? Is it always crashing or freezing? If yes, you may be tempted to go out and buy a new one. But then what do you do with your old PC? Here are five ways to repurpose your old computer instead of getting rid of it.

Set up a guest computer

If your organization works with temporary staff and consultants, you might want to use your old PC as a guest computer. This is ideal for simple tasks like browsing the web, sending out emails, and using standard productivity programs.

To set up your guest computer, you need to reformat it first. The next step is to install the latest version of your preferred operating system. And don’t forget to install security updates and set up guest restrictions to prevent unauthorized users from accessing critical data and systems.

Enable kiosk mode

With single-app kiosks, users can access a designated app quickly and securely by using the “Assigned Access” feature. The user’s account will sign in directly to this one special app, blocking all other activities on the device for an extra layer of safety.

At its core, kiosk mode allows you to convert any device into a helpful tool. Use it as an internet gateway for visitors, to create eye-catching digital signage with your product on display, or to let customers fill out forms quickly and easily.

You can enable kiosk mode by going to Settings > Accounts > Family & other users. Then choose the Set up assigned access option. You can then select the app the system can access.

Create a NAS server

If your outdated PC has at least 8 GB RAM, or if you can upgrade it, you can transform it into a NAS (network-attached storage) server. A NAS server is a server for your small-business network that you can use to store files that need to be shared with all the computers on the network.

To turn your old computer into a NAS server, you can download TrueNAS. This software is compatible with Windows, MacOS, and Linux. You can use it to create a shared back up of all devices in your network.

On the other hand, if you’d rather convert your old PC into a private cloud, we recommend Daemon Sync. This free cloud solution makes it easy to back up your data and keep it synchronized between devices. It is a secure and convenient way to make sure photos, videos, documents and other important information stay up to date across all your different devices, including computers, tablets, and smartphones.

Protect your online privacy

Upgrade your obsolete computer by installing Tails (The Amnesic Incognito Live System) and enjoy your very own secure, private PC.

Tails is a portable operating system that routes your internet traffic through the anonymity network TOR. It protects users against online surveillance and identity theft. Tails also offers encryption for file storage, chat messaging, and email applications.

Salvage PC parts

If you can’t repurpose your old computer into a NAS server or service kiosk, why not reuse some of its hardware components instead?

For instance, you can utilize RAM sticks to upgrade another machine, use hard drives as external storage devices, and get more out of an old monitor by setting it up with a second display. You can even resell your motherboard and video cards. Additionally, you can use your old USB adapters, Ethernet cords, and AUX leads are for different electronics.

Even if your computer is starting to show its age, there are still a number of ways that you can make the most out of it. If you’re not sure how to do any of these things yourself, our team can help. Contact us today and we’ll be happy to help breathe new life into your old computer.

If you’re like most people, you probably think it’s time to buy a new computer when it starts to slow down or crash all the time, and when it’s just generally not meeting your needs. But before you go shopping for a new computer, consider all of the ways that your old one could still be useful. Here are five things you can do with your outdated PC instead of throwing it away.

Set up a guest computer

If your organization works with temporary staff and consultants, you might want to use your old PC as a guest computer. This is ideal for simple tasks like browsing the web, sending out emails, and using standard productivity programs.

To set up your guest computer, you need to reformat it first. The next step is to install the latest version of your preferred operating system. And don’t forget to install security updates and set up guest restrictions to prevent unauthorized users from accessing critical data and systems.

Enable kiosk mode

With single-app kiosks, users can access a designated app quickly and securely by using the “Assigned Access” feature. The user’s account will sign in directly to this one special app, blocking all other activities on the device for an extra layer of safety.

At its core, kiosk mode allows you to convert any device into a helpful tool. Use it as an internet gateway for visitors, to create eye-catching digital signage with your product on display, or to let customers fill out forms quickly and easily.

You can enable kiosk mode by going to Settings > Accounts > Family & other users. Then choose the Set up assigned access option. You can then select the app the system can access.

Create a NAS server

If your outdated PC has at least 8 GB RAM, or if you can upgrade it, you can transform it into a NAS (network-attached storage) server. A NAS server is a server for your small-business network that you can use to store files that need to be shared with all the computers on the network.

To turn your old computer into a NAS server, you can download TrueNAS. This software is compatible with Windows, MacOS, and Linux. You can use it to create a shared back up of all devices in your network.

On the other hand, if you’d rather convert your old PC into a private cloud, we recommend Daemon Sync. This free cloud solution makes it easy to back up your data and keep it synchronized between devices. It is a secure and convenient way to make sure photos, videos, documents and other important information stay up to date across all your different devices, including computers, tablets, and smartphones.

Protect your online privacy

Upgrade your obsolete computer by installing Tails (The Amnesic Incognito Live System) and enjoy your very own secure, private PC.

Tails is a portable operating system that routes your internet traffic through the anonymity network TOR. It protects users against online surveillance and identity theft. Tails also offers encryption for file storage, chat messaging, and email applications.

Salvage PC parts

If you can’t repurpose your old computer into a NAS server or service kiosk, why not reuse some of its hardware components instead?

For instance, you can utilize RAM sticks to upgrade another machine, use hard drives as external storage devices, and get more out of an old monitor by setting it up with a second display. You can even resell your motherboard and video cards. Additionally, you can use your old USB adapters, Ethernet cords, and AUX leads are for different electronics.

Even if your computer is starting to show its age, there are still a number of ways that you can make the most out of it. If you’re not sure how to do any of these things yourself, our team can help. Contact us today and we’ll be happy to help breathe new life into your old computer.

If you are having performance issues, problems shutting down, booting up, memory or apps on your computer, you may have to perform a clean install of Windows 11. A clean install of Windows 11 entails wiping out all existing system files and reinstalling the operating system from scratch. This helps to resolve any conflicts that have built up over time due to software updates or other changes. There are four methods you can use to perform a clean install of Windows 11.

1. USB drive

The simplest way to perform a clean install of Windows 11 is to create a bootable USB drive with Microsoft’s media creation tool. This requires an 8 GB or larger USB drive and a valid Windows 11 Product Key (or digital license).

Once the USB drive is created, insert it into your computer and reboot. If your PC does not automatically boot from the USB drive, you will need to access the BIOS menu by pressing the appropriate key during startup (e.g., DEL, F12, etc.) and change the boot settings.

When you boot through the USB, you’ll be guided through the Windows 11 installation process. If you are reinstalling Windows 11, you won’t need to enter a product key. You simply need to accept the license terms, select the hard drive you want to install Windows 11 on, and follow the onscreen instructions. Keep in mind that deleting a drive partition or reinstalling Windows 11 on a specific drive will erase all the data stored on that drive.

During the installation, you’ll have to select the language and region, name your PC, determine whether the device is for personal or professional use, set up your Microsoft account, and customize your privacy settings.

2. ISO file

You can install Windows 11 by downloading an ISO file from the Microsoft support site. When downloaded, right-click the ISO file, click Mount > Virtual drive. Then, double-click the setup.exe file to begin the Windows 11 installation. Go through the installation guide and link the device to your Microsoft account.

3. Reset PC from recovery settings

If you already have Windows 11 installed but are experiencing issues like frequent system freezes, slow boot times, and more, you may be able to fix the problem by resetting your PC from the recovery settings. This method doesn’t work if you’re planning to upgrade from an older version of Windows.

To reset your PC, go to Settings > System > Recovery. In the recovery options, click on the Reset this PC button, click the remove everything option, and then select local reinstall. You can also configure the reinstallation options and choose whether to wipe just data, delete files from all drives, or download Windows from the cloud. Finally, press confirm and reset to reinstall Windows 11.

4. Advanced startup options

If you’re unable to boot your PC normally, you can use the advanced startup options to perform a clean install of Windows 11. To access the advanced startup options, press and hold the power button on your PC to do a hard reboot. Do this at least three times until the screen says “Automatic Repair.”

When you see this message, go to Advanced Options > Troubleshoot > Reset this PC > Remove everything . Select either cloud download or local reinstall, and choose whether to remove only files or format the entire drive. You’ll then be guided through the setup process as if you were doing a clean install from a USB drive.

Note that this method only works if you already have Windows 11 installed on the device.

Reinstalling Windows 11 can be a daunting process, which is why you can always consult with us to help you with the process. We have experience in performing clean installations of Windows 11 and can help you avoid any potential problems. Call us today.

A clean installation of Windows 11 is a great way to get your computer running like new again. It involves completely erasing all the data on your hard drive and then reinstalling Windows from scratch, with no software or files left over from previous versions. This can help improve performance and fix any system errors that may have been caused by corrupted files in the past. Additionally, it also gives you an opportunity to start fresh with a brand new operating system and customize it to meet your specific needs. A clean install of Windows 11 can be accomplished in four ways.

1. USB drive

The simplest way to perform a clean install of Windows 11 is to create a bootable USB drive with Microsoft’s media creation tool. This requires an 8 GB or larger USB drive and a valid Windows 11 Product Key (or digital license).

Once the USB drive is created, insert it into your computer and reboot. If your PC does not automatically boot from the USB drive, you will need to access the BIOS menu by pressing the appropriate key during startup (e.g., DEL, F12, etc.) and change the boot settings.

When you boot through the USB, you’ll be guided through the Windows 11 installation process. If you are reinstalling Windows 11, you won’t need to enter a product key. You simply need to accept the license terms, select the hard drive you want to install Windows 11 on, and follow the onscreen instructions. Keep in mind that deleting a drive partition or reinstalling Windows 11 on a specific drive will erase all the data stored on that drive.

During the installation, you’ll have to select the language and region, name your PC, determine whether the device is for personal or professional use, set up your Microsoft account, and customize your privacy settings.

2. ISO file

You can install Windows 11 by downloading an ISO file from the Microsoft support site. When downloaded, right-click the ISO file, click Mount > Virtual drive. Then, double-click the setup.exe file to begin the Windows 11 installation. Go through the installation guide and link the device to your Microsoft account.

3. Reset PC from recovery settings

If you already have Windows 11 installed but are experiencing issues like frequent system freezes, slow boot times, and more, you may be able to fix the problem by resetting your PC from the recovery settings. This method doesn’t work if you’re planning to upgrade from an older version of Windows.

To reset your PC, go to Settings > System > Recovery. In the recovery options, click on the Reset this PC button, click the remove everything option, and then select local reinstall. You can also configure the reinstallation options and choose whether to wipe just data, delete files from all drives, or download Windows from the cloud. Finally, press confirm and reset to reinstall Windows 11.

4. Advanced startup options

If you’re unable to boot your PC normally, you can use the advanced startup options to perform a clean install of Windows 11. To access the advanced startup options, press and hold the power button on your PC to do a hard reboot. Do this at least three times until the screen says “Automatic Repair.”

When you see this message, go to Advanced Options > Troubleshoot > Reset this PC > Remove everything . Select either cloud download or local reinstall, and choose whether to remove only files or format the entire drive. You’ll then be guided through the setup process as if you were doing a clean install from a USB drive.

Note that this method only works if you already have Windows 11 installed on the device.

Reinstalling Windows 11 can be a daunting process, which is why you can always consult with us to help you with the process. We have experience in performing clean installations of Windows 11 and can help you avoid any potential problems. Call us today.

Performing a clean install of Windows 11 allows you to start fresh with a completely new operating system that is free of old settings, unnecessary files, and potential malware. It also gives you the opportunity to upgrade your machine if you’ve been using an older version of Windows. Doing so can give your device faster boot times, improved stability, and enhanced protection against malicious software. Here are the different methods you can take to perform a clean install of Windows 11.

1. USB drive

The simplest way to perform a clean install of Windows 11 is to create a bootable USB drive with Microsoft’s media creation tool. This requires an 8 GB or larger USB drive and a valid Windows 11 Product Key (or digital license).

Once the USB drive is created, insert it into your computer and reboot. If your PC does not automatically boot from the USB drive, you will need to access the BIOS menu by pressing the appropriate key during startup (e.g., DEL, F12, etc.) and change the boot settings.

When you boot through the USB, you’ll be guided through the Windows 11 installation process. If you are reinstalling Windows 11, you won’t need to enter a product key. You simply need to accept the license terms, select the hard drive you want to install Windows 11 on, and follow the onscreen instructions. Keep in mind that deleting a drive partition or reinstalling Windows 11 on a specific drive will erase all the data stored on that drive.

During the installation, you’ll have to select the language and region, name your PC, determine whether the device is for personal or professional use, set up your Microsoft account, and customize your privacy settings.

2. ISO file

You can install Windows 11 by downloading an ISO file from the Microsoft support site. When downloaded, right-click the ISO file, click Mount > Virtual drive. Then, double-click the setup.exe file to begin the Windows 11 installation. Go through the installation guide and link the device to your Microsoft account.

3. Reset PC from recovery settings

If you already have Windows 11 installed but are experiencing issues like frequent system freezes, slow boot times, and more, you may be able to fix the problem by resetting your PC from the recovery settings. This method doesn’t work if you’re planning to upgrade from an older version of Windows.

To reset your PC, go to Settings > System > Recovery. In the recovery options, click on the Reset this PC button, click the remove everything option, and then select local reinstall. You can also configure the reinstallation options and choose whether to wipe just data, delete files from all drives, or download Windows from the cloud. Finally, press confirm and reset to reinstall Windows 11.

4. Advanced startup options

If you’re unable to boot your PC normally, you can use the advanced startup options to perform a clean install of Windows 11. To access the advanced startup options, press and hold the power button on your PC to do a hard reboot. Do this at least three times until the screen says “Automatic Repair.”

When you see this message, go to Advanced Options > Troubleshoot > Reset this PC > Remove everything . Select either cloud download or local reinstall, and choose whether to remove only files or format the entire drive. You’ll then be guided through the setup process as if you were doing a clean install from a USB drive.

Note that this method only works if you already have Windows 11 installed on the device.

Reinstalling Windows 11 can be a daunting process, which is why you can always consult with us to help you with the process. We have experience in performing clean installations of Windows 11 and can help you avoid any potential problems. Call us today.

Microsoft is actively developing updates to Windows 11, which will gradually be released throughout 2023 as Moment updates. Moments was introduced as part of the 22H2 update, and promises a steady flow of improvements and features as soon as they are ready outside major releases. Read on to learn more about these new Windows 11 updates for 2023.

Say goodbye to yearly updates

Microsoft is returning to its classic three-year cycle for major Windows releases and distributing smaller updates every couple of months. According to Windows Central, this strategy will provide a more efficient means of keeping all versions up to date with minimal disruption. Microsoft will reportedly roll out no more than four updates annually, meaning that we can expect an update approximately every three months, or one per season.

Moments 2 updates

With the Moment 2 update for Windows 11 expected in February or March, users can look forward to a range of exciting new features, such as:

Tablet mode Taskbar
The Taskbar in Tablet mode now has the streamlined look and feel of Windows 10X. When a touchscreen is detected, but no keyboard or mouse is connected to the device, this new feature will enable users to maximize their app space by reducing the size of the Taskbar. By swiping up on the Taskbar, you can quickly access pinned or currently running apps.

Task Manager update
A brand-new filter function is being introduced with the new version of Task Manager that makes it simpler to look up processes using the binary name, PID (process identification number), or publisher name. The filter algorithm quickly locates the context keyword on the current page and any other pages you may switch to. You can also use the keyboard shortcut Alt + F to bring up the filter box for easy access.

Search tips in the Taskbar
Microsoft is developing innovative approaches to present users with helpful tips on the Taskbar, which makes it simpler to use the search feature. With the next feature drop update, users will see pop-up suggestions that show how to use the search feature quickly and efficiently using shortcuts.

Moment 3 and beyond

Microsoft’s Moment 3 update for Windows 11 is slated for late spring/early summer, potentially in May or June. It remains uncertain what features Moment 3 will include, but it’s said that Microsoft is striving to make advances in foldable PCs, both single-screen and dual-screen models.

Changes are also being planned for the Windows search user interface and an array of preinstalled applications. Microsoft is planning to replace the Windows Mail & Calendar apps with the new Outlook web client shortly after it gains compatibility with external email services.

The upcoming updates will also revise legacy interfaces with sleek modern designs that conform seamlessly to Windows 11. The USB autoplay interface, recovery and device rename dialogs, and Windows firewall pop-ups from earlier versions of Windows, such as Windows 8 and 7, will be given a makeover in 2023.

These are just some of the changes Microsoft plans to roll out this year for Windows 11. If you want to learn more about the latest updates for Windows 11, get in touch with our experts today.

Microsoft is pushing forward with a multitude of noteworthy improvements for Windows 11 that are projected to become available via Moment updates, which began with Windows 11 version 22H2 in September 2022. In this article, we’ll discuss what you can expect from Windows 11 this year.

Say goodbye to yearly updates

Microsoft is returning to its classic three-year cycle for major Windows releases and distributing smaller updates every couple of months. According to Windows Central, this strategy will provide a more efficient means of keeping all versions up to date with minimal disruption. Microsoft will reportedly roll out no more than four updates annually, meaning that we can expect an update approximately every three months, or one per season.

Moments 2 updates

With the Moment 2 update for Windows 11 expected in February or March, users can look forward to a range of exciting new features, such as:

Tablet mode Taskbar
The Taskbar in Tablet mode now has the streamlined look and feel of Windows 10X. When a touchscreen is detected, but no keyboard or mouse is connected to the device, this new feature will enable users to maximize their app space by reducing the size of the Taskbar. By swiping up on the Taskbar, you can quickly access pinned or currently running apps.

Task Manager update
A brand-new filter function is being introduced with the new version of Task Manager that makes it simpler to look up processes using the binary name, PID (process identification number), or publisher name. The filter algorithm quickly locates the context keyword on the current page and any other pages you may switch to. You can also use the keyboard shortcut Alt + F to bring up the filter box for easy access.

Search tips in the Taskbar
Microsoft is developing innovative approaches to present users with helpful tips on the Taskbar, which makes it simpler to use the search feature. With the next feature drop update, users will see pop-up suggestions that show how to use the search feature quickly and efficiently using shortcuts.

Moment 3 and beyond

Microsoft’s Moment 3 update for Windows 11 is slated for late spring/early summer, potentially in May or June. It remains uncertain what features Moment 3 will include, but it’s said that Microsoft is striving to make advances in foldable PCs, both single-screen and dual-screen models.

Changes are also being planned for the Windows search user interface and an array of preinstalled applications. Microsoft is planning to replace the Windows Mail & Calendar apps with the new Outlook web client shortly after it gains compatibility with external email services.

The upcoming updates will also revise legacy interfaces with sleek modern designs that conform seamlessly to Windows 11. The USB autoplay interface, recovery and device rename dialogs, and Windows firewall pop-ups from earlier versions of Windows, such as Windows 8 and 7, will be given a makeover in 2023.

These are just some of the changes Microsoft plans to roll out this year for Windows 11. If you want to learn more about the latest updates for Windows 11, get in touch with our experts today.

Windows 11 underwent various upgrades over the course of 2022, with the 22H2 update being the most significant. But what does 2023 have in store for Windows 11 users? While the initial information is limited, Microsoft intends to continue refining this operating system to ensure a continuous and smooth experience across computers and mobiles. Here’s what we know so far.

Say goodbye to yearly updates

Microsoft is returning to its classic three-year cycle for major Windows releases and distributing smaller updates every couple of months. According to Windows Central, this strategy will provide a more efficient means of keeping all versions up to date with minimal disruption. Microsoft will reportedly roll out no more than four updates annually, meaning that we can expect an update approximately every three months, or one per season.

Moments 2 updates

With the Moment 2 update for Windows 11 expected in February or March, users can look forward to a range of exciting new features, such as:

Tablet mode Taskbar
The Taskbar in Tablet mode now has the streamlined look and feel of Windows 10X. When a touchscreen is detected, but no keyboard or mouse is connected to the device, this new feature will enable users to maximize their app space by reducing the size of the Taskbar. By swiping up on the Taskbar, you can quickly access pinned or currently running apps.

Task Manager update
A brand-new filter function is being introduced with the new version of Task Manager that makes it simpler to look up processes using the binary name, PID (process identification number), or publisher name. The filter algorithm quickly locates the context keyword on the current page and any other pages you may switch to. You can also use the keyboard shortcut Alt + F to bring up the filter box for easy access.

Search tips in the Taskbar
Microsoft is developing innovative approaches to present users with helpful tips on the Taskbar, which makes it simpler to use the search feature. With the next feature drop update, users will see pop-up suggestions that show how to use the search feature quickly and efficiently using shortcuts.

Moment 3 and beyond

Microsoft’s Moment 3 update for Windows 11 is slated for late spring/early summer, potentially in May or June. It remains uncertain what features Moment 3 will include, but it’s said that Microsoft is striving to make advances in foldable PCs, both single-screen and dual-screen models.

Changes are also being planned for the Windows search user interface and an array of preinstalled applications. Microsoft is planning to replace the Windows Mail & Calendar apps with the new Outlook web client shortly after it gains compatibility with external email services.

The upcoming updates will also revise legacy interfaces with sleek modern designs that conform seamlessly to Windows 11. The USB autoplay interface, recovery and device rename dialogs, and Windows firewall pop-ups from earlier versions of Windows, such as Windows 8 and 7, will be given a makeover in 2023.

These are just some of the changes Microsoft plans to roll out this year for Windows 11. If you want to learn more about the latest updates for Windows 11, get in touch with our experts today.