 Perhaps you’re one of the thousands of Windows 8 users who rejoiced in the return of the Start Menu, the improved multitasking feature, and a more prominent Cortana display in Windows 10. But there are more key functions in Windows 10 you probably didn’t know about.
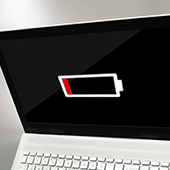
Performance/Power slider
There are two kinds of computer users: those who value battery longevity and those who prefer optimized system performance. The Performance/Power slider in Windows 10 lets you easily toggle between the ‘Best battery life’ (when you’re trying to save battery) and the ‘Best performance’ (when you need your system to perform optimally), or set a balanced battery and system performance setting.
Just click the battery icon in the taskbar and adjust the slider based on your preference.
Night Light
Those who use computers late at night can turn on Night Light to reduce the amount of blue light emitted from the screen. This feature substitutes the blue light with warmer colors, which reduces eye strain and helps you sleep easily.
Night Light is disabled by default, so you need to enable it by following these steps:
- Click the Start Menu
- Click the Settings app (or press WIN + I to quickly open Settings)
- Click the System icon>Display
- Set Night light to ‘On’ or ‘Off’
Taskbar pin
It takes only a few seconds to open a browser and type a website’s address or click Bookmarks and choose from a list of websites you frequently visit. But Windows 10 offers an even quicker way to access your go-to sites by allowing you to pin websites on the Windows 10 taskbar.
Simply click “Pin this page to the taskbar” on the Microsoft Edge menu, and the site’s icon will appear on the taskbar for easy perusal.
Drag to pin windows
Need to organize your screen but can’t help having many open windows? Reduce screen clutter by dragging any window to a corner so it can take a quarter of the screen. For multiple screens, drag a window to any border and wait for the prompt that tells you to put the window in the selected corner.
Focus Assist
Notifications can be distracting, but Windows 10’s Focus Assist feature can manage the notifications you receive from contacts and applications. This function also lets you customize the list of notifications you wish to prioritize.
To enable Focus Assist, go to:
- Settings
- System
- Focus Assist
- Adjust the notifications settings based on your preference
If you wish to disable it and receive all notifications, click ‘Off.’
The features we’ve included here are just some of the many Windows 10 functions that save time and add value to business-users’ lives. For more software and productivity recommendations, give our IT consultants a call today.
 Got a new laptop? Windows 10 includes some wonderful features along with a revamped interface for Microsoft’s operating system. No matter how experienced you are with Windows, you still may need help getting used to this, so let’s get you started.
 There are things
  First things first, what should you do with your brand new laptop? You go through the Windows 10 setup, and you’re all done, right? Not really. Your notebook isn’t ready — until you do some tweaking. Let’s get the ball rolling.
 Lately, Microsoft has given some love to Outlook — not just the desktop app, but also the web and app versions. In fact, they just released a bunch of new and improved features. Let’s take a look.
 The new Outlook features can help you manage your time, respond to emails, take care of important things and more. Also, new upcoming features will connect you to the people and technology that power your productivity and help protect you and your business. Want to see what’s new and coming soon from Microsoft? Read on.
 Microsoft outlined a list of new features it will deliver to its various Outlook apps, including bill-pay reminders, better calendaring across time zones, and a way to see who has RSVP’d for a meeting. Here are five that could potentially be the most important.
 Ransomware brings a world of trouble to any business. From operational disruption and revenue loss to total shutdown, no company is spared. That is why it’s wise to regularly back up your business data in multiple locations, including the cloud. Which is where Windows 10’s backup and restore tools come in handy.
 Ransomware attacks are in the headlines again, and thankfully, business owners are becoming more aware of the malicious software’s damaging effects. Companies realize that without safe and reliable data backup, important business information can fall into the wrong hands. This is why Windows offers easy-to-use tools like File History and OneDrive.
 Buyers are not short of choices when it comes to Windows products. Apart from the long list of apps available in the Windows store, they also have to decide whether they want a Windows 10 Home, Pro, or 10 S operating system. We understand that choosing a Windows 10 version can be confusing, so to simplify things, we’ve listed the differences of each.
 With fast performance, regular updates, and a helpful digital assistant, Windows 10 is a must-have operating system (OS) for both individual consumers and entire businesses. But before you purchase it, you’ll have to decide between Windows 10 Home, Pro, and 10 S. So which one is right for you?
 When buying new hardware, you have to choose which operating system (OS) to install. And if you go with Windows, you’ll have to make even more decisions, as there’re Windows 10 Home, Pro, and 10 S. Although they contain many similar features, there are significant differences between them. Here’s a quick rundown of each OS version.